


The No-Casing Elastic: A Flatter, Bulk-Free Sewing Technique
Elastic waistbands are a staple in comfortable clothing, but traditional casing methods can often create unwanted bulk and bunching. In this article, I'll share a clever technique for inserting elastic directly into a waistband without using a casing, resulting in a smoother, flatter finish that sits beautifully against the body.
Materials You'll Need
- Your garment with waistband area prepared
- Elastic in your desired width (3/4" to 1" works well for most applications)
- Sewing machine with zigzag stitch capability
- Straight pins or clips
- Measuring tape
- Scissors
- Thread matching your fabric
The No-Casing Elastic Technique
Step 1: Prepare Your Garment
Finish the top edge of your garment where the waistband will be attached. This could be with a serged edge, a simple zigzag stitch, or your preferred seam finishing method. Press this edge.
Step 2: Measure and Cut Your Elastic
Measure your waist (or wherever the garment will sit) and cut your elastic to approximately 75-85% of that measurement, depending on how snug you want the fit. For example, if your waist measures 30 inches, your elastic might be 24-25 inches.
Step 3: Mark Quarter Points
To ensure even distribution:
- Fold your elastic in half and mark the midpoint
- Fold each half again and mark those quarter points
- Do the same with your garment's waistline
Step 4: Pin Elastic to Fabric
Position the elastic along the wrong side of the fabric, aligning the edge of the elastic with the top edge of your garment. Pin at the quarter points you marked, stretching the elastic slightly between pins.
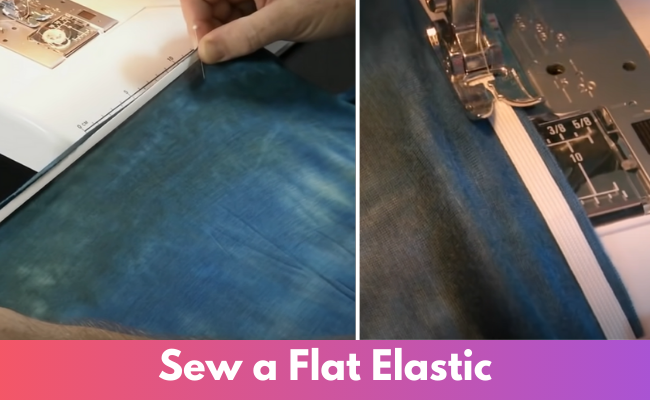
Step 5: The First Stitch Line
Set your machine to a wide zigzag stitch (approximately 5mm wide and 2.5mm long). The key technique here:
- Place the fabric under your presser foot with the elastic on top
- Position the edge of the elastic at the top edge of the fabric
- As you sew, stretch the elastic to match the fabric length between pins
- The zigzag stitch should catch both the elastic and fabric
- Continue around the entire waistline, maintaining even tension
Step 6: Fold and Stitch Again
- Fold the elastic and fabric edge to the wrong side of the garment
- The fold should be just below your first line of stitching
- Pin in place at quarter points
- Using another zigzag stitch, sew close to the bottom edge of the elastic
- Again, stretch the elastic between pins as you sew
Step 7: Final Securing Stitch (Optional)
For extra security and a decorative touch, you can add a third line of stitching. Use a twin needle, another zigzag, or a decorative stitch along the bottom of the folded waistband on the right side of the garment.
Why This Method Creates a Flatter Finish
This technique creates a superior finish for several reasons:
- The elastic is directly secured to the fabric with no extra layers
- The zigzag stitching allows the elastic to stretch while keeping it flat
- There's no tunnel for the elastic to twist inside
- The fold creates a clean finish with minimal bulk
- The direct attachment prevents the waistband from folding or collapsing
Variations and Tips
- For lightweight fabrics, consider using a lighter weight elastic
- For heavier fabrics, you might want a slightly wider elastic
- Test your zigzag width and length on scraps before starting
- If your fabric is very stretchy, reduce the amount you stretch the elastic while sewing
- For extra comfort, fold a strip of soft jersey or bias tape over the elastic before attaching


